User:CloudsInMind/Sandbox
 | |
| Breed | Domestic Shorthair |
|---|---|
| Coat | Calico |
| Sex | Spayed Female |
| Rarity | Uncommon |
| Occupation | Web Weaver |
| Appearance | Calico Patterning |
| Personality | Lax |
| First known sighting | December 12, 2024 |
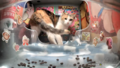
Ms. Como is a calico cat that frequents the Kirby of the Beautiful Star feeder. She is named after Como,[1] a common enemy character originating from the video game Kirby's Dream Land 3.[2]
Behavior
Ms. Como is a pretty lax cat. More often than not, she is usually seen just eating for a few minutes then leaving. There has been times where she does quickly rest while waiting for food, but it is uncommon for her to do.
Appearance
Ms. Como is a short haired cat with calico patterning. Blotches of orange and black can be seen on her forehead, back, sides and tail, while white can be seen on her face, chest, belly and limbs. She also has a tipped ear to her right, indicating she was spayed during TNR.

Sightings
December 2024
- December 12, 2024: At 04:09 AM (LFT), Ms. Como was seen by international viewers for the first time. She entered the feeder for a quick bite to eat before heading out for the day.
- December 13, 2024: At 03:08 AM (LFT), Ms. Como arrived at the feeder. She propped herself up on the dispenser's rim, then walked out around the feeder, then went back inside. She sat inside, watching the front camera.
- December 20, 2024: At 05:06 AM (LFT), Ms. Como showed up at the feeder. She didn't stick around for too long, only having a small bite.
- December 23, 2024: At 05:05 AM (LFT), Ms. Como was seen pulling herself into the feeder by holding on the dispensers rim. She wasn't too happy after being recorded with such antics, and gave the camera a mean look while she sat.
February 2025
- February 04, 2025: At 04:45 PM (LFT), Ms. Como was spotted staring at the front camera very intently while laying in front of the feeder. It is unsure why she thought this was a good idea.
- February 17, 2025: At 02:30 PM (LFT), Ms. Como arrived at the feeder investigating the dispenser. She sniffed around and looked at every nook and cranny, until she got bored and left.
- February 18, 2025:
- At 12:24 AM (LFT), Ms. Como showed up for a very quick bite at the feeder.
- Later at 05:38 AM (LFT), Ms. Como arrived at the feeder, only to immediately leave seconds after.
- February 21, 2025: At 04:40 PM (LFT), Ms. Como was seen eating out of the feeder for a few minutes. Afterwards, she laid down in front of the feeder, giving the front camera a cute look.
- February 22, 2025:
- At 01:11 AM (LFT), Ms. Como had a quick bite to eat from the feeder.
- Later at 02:24 AM (LFT), Ms. Como returned to the feeder to eat a bit more, and left soon after.
- February 23, 2025: At 03:19 AM (LFT), Ms. Como showed up at the feeder. She stuck her paw inside the feeder bowl, and took it out after a few seconds of nothing happening. She looked around the feeder, then backed up to have a sit. She sat for a minute, then morphed into a loaf position for the next few minutes.
(Not every cat sighting is documented.)
(LFT = "Local Feeder Time")
Gallery
-

Ms. Como entering the feeder.
-

Ms. Como having a quick rest.
-

Ms. Como holding herself up on the dispenser's rim.
-

Ms. Como staring at the front camera.
-

girl what are you doing.
-
Ms. Como looking very cute.


References
 | |
| Breed | Domestic Shorthair |
|---|---|
| Coat | White |
| Sex | Spayed Female |
| Rarity | Uncommon |
| Occupation | Snowman Imitator |
| Appearance | White |
| Personality | Chill, Cold, Loner |
| First known sighting | December 09, 2024 |
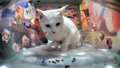
Ms. Chilly is a cat that frequents the Kirby of the Beautiful Star feeder. She is named after Chilly,[1] a minor enemy character originating from the video game Kirby's Adventure.[2]
Behavior
Ms. Chilly, true to her name, is a relatively chill cat. She likes to have a quick rest before or after she eats at the feeder. She either loafs, or sits regularly while getting some shut-eye, and doesn't do much else. She is a very simple cat.
Appearance
Ms. Chilly is a short haired cat, and has a solid white coat. Unlike Mr. Kracko, Ms. Chilly has a tipped ear on her right from a past TNR, and a tuff of fluff on the tip of her other ear, both of which are notable ways to discern her from her white counterpart.

Sightings
December 2024
- December 09, 2024: At 03:59 PM (LFT), Ms. Chilly was seen by international viewers for the first time. She entered the feeder and decided to sit around inside. Eventually she turned to a loaf position, staring at the front camera.
- December 20, 2024: At 08:52 AM (LFT), Ms. Chilly was spotted loafing inside the feeder. She didn't do too much but look around and get a quick rest.
- December 22, 2024: At 08:05 AM (LFT), Ms. Chilly was seen sleeping while standing up. She didn't find it too comfortable though, and decided to quickly loaf afterwards.
February 2024
- February 17, 2025: At 03:14 AM (LFT), Ms. Chilly arrived at the feeder for a quick snack. After a few bites, she made a improper loaf while looking at her surroundings.
- February 24, 2025: At 03:07 AM (LFT), Ms. Chilly was seen sitting around inside the feeder. She sat very politely for a few minutes until someone dispensed some food for her. She had plenty to eat before forming a loaf for yet another few minutes.
- February 25, 2025: At 02:52 AM (LFT), Ms. Chilly sat around inside the feeder, switching from sitting to laying around. She stuck around for about ten minutes before heading out.
(Not every cat sighting is documented.)
(LFT = "Local Feeder Time")
Gallery
-
Ms. Chilly about to turn into a loaf.
-

Ms. Chilly lost in thought. Not a single neuron in her head.
-

Ms. Chilly trying to look like her namesake.


References
| |||||||||